Introduction
In today's post, we'll see how to create your own profile README on GitHub.
If you don't already know, GitHub is a project management and code version control system. Its primary use is to collaborate with others, plan projects, and track work.
Each user has a profile where they store their private repositories, access public ones, and those shared with them. Additionally, users have the opportunity to include a profile README to introduce themselves to others, talk about their projects, or display statistics about their profile. That's what we're going to do today!
Creating the Repository
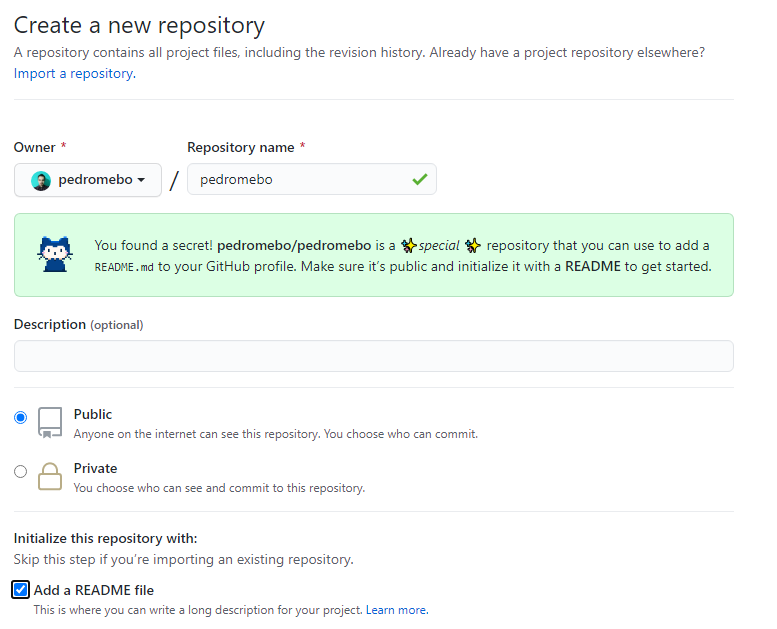
To get started, the first thing we need to do is create a repository with the same name as our username. We should make it public and select the option to create a README at the beginning.

Configuring the README
Once the repository is created, all that's left is to configure the README and style it as you like. In my case, I'll use references I found in an "Awesome-Readme" list. If you're not familiar with awesome lists, we discussed them in last week's post. Click here to see it.
Some elements that should not be missed include:
- Introduction
- What are you studying? What do you work on?
- Recent or active projects?
- Social media
- Stats
- Projects
You can decorate it and add any information you like. Remember, it's a great space to showcase yourself, so make the most of it!
Profile Example
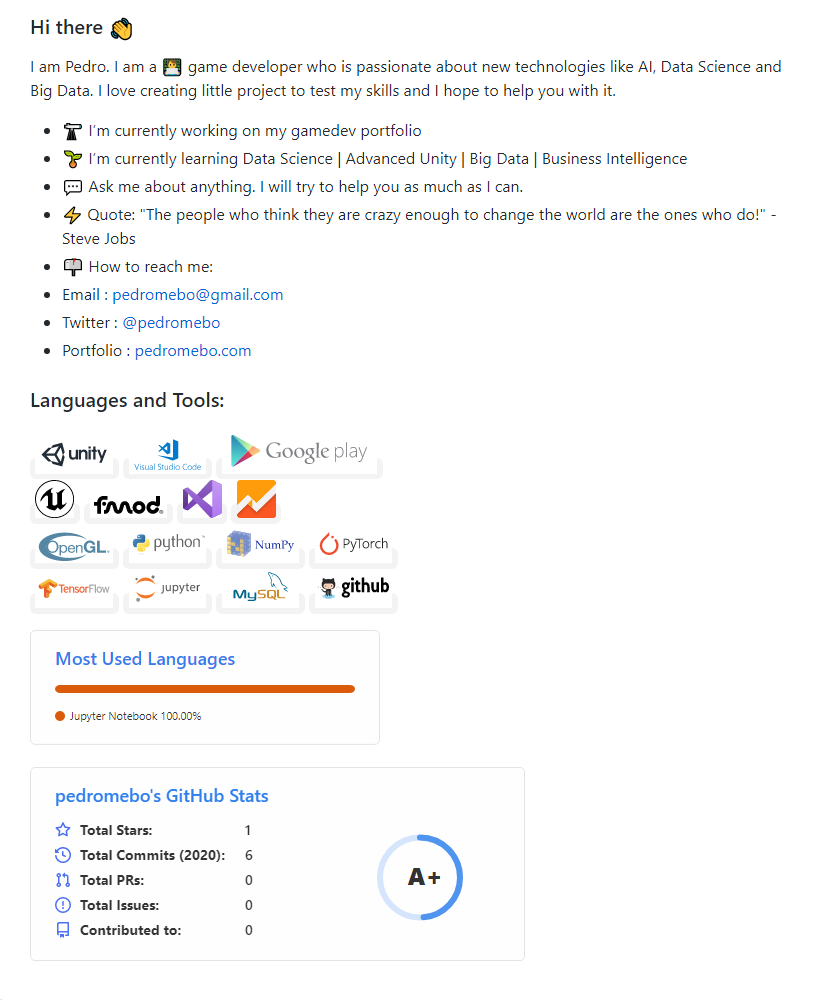
Here's how my profile looks. As you can see, being a new account, not all the commits I've made over the year are shown, but this will soon change as there is much content coming up. Stay tuned!

https://github.com/pedromebo/pedromebo
Remember, if you liked it or think it could be of interest to a friend or acquaintance, don't hesitate to share it. See you next time.


